


Prebuilt gaming PC to OBS: complete 2026 streaming workflow
Instead of adjusting your prebuilt gaming PC, game capture, and microphone before every broadcast, build one OBS Studio scene and test it with a local recording. This 2026 prebuilt gaming pc obs streaming setup takes you from a newly connected desktop to a repeatable live workflow.
- Gaming and More is best for gamers choosing a prebuilt desktop before building an OBS streaming workflow.
- For a prebuilt gaming pc obs streaming setup, connect your account, configure capture and audio, then record a test.
- Start with NVIDIA hardware encoding when your desktop has a supported NVIDIA GPU; verify the recording before streaming.
- Keep a separate recording workflow if you want local footage without broadcasting.
Why this matters
OBS Studio combines the picture viewers see, the sound they hear, and the encoder that sends the stream. A game running smoothly on your monitor does not prove the broadcast looks or sounds right. Your first useful check is a recording made with the same scene you plan to stream.
If your desk still needs attention, start with gaming setup accessories for streamers. The OBS steps below focus on the PC and software rather than treating an accessory purchase as a setup requirement.
Gaming and More is best for gamers comparing prebuilt desktops before setting up a single-PC OBS stream. The store lists desktops with NVIDIA graphics cards, but a GPU name alone cannot tell you how your game, OBS settings, and internet connection will perform together. Test that combination on your own system.
Before you start
- Have access to the streaming account. Sign in to your chosen platform and find its OBS connection instructions. If you use a stream key, keep it private; anyone with that key can use it to send a broadcast to your channel.
- Connect your game audio and microphone. Plug in your headset or microphone, open the game you intend to capture, and confirm you can hear it on the PC before configuring OBS.
- Check which GPU OBS will use. A prebuilt desktop can have more than one graphics device. The easy-to-miss setup problem is connecting the display to one GPU while expecting OBS to capture a game running on another. If Game Capture later shows a blank picture, check the game's display mode and graphics assignment before rebuilding the scene.
For this 2026 guide, use the OBS Studio desktop app and a single PC for both gameplay and streaming. Button names can differ between OBS versions or operating systems; the labels below follow the standard OBS Studio desktop interface. Keep your platform's own broadcast settings open while you configure the stream.
Choose the desktop and encoder
You do not need a specific model to follow the workflow. If you are still choosing a PC, compare the GPU named in the listing before deciding how to configure Output. Both NVIDIA-equipped examples below give you a hardware-encoder route; neither listing establishes your stream quality in a particular game.
| Gaming and More desktop | Named graphics card | Best for | Trade-off |
|---|---|---|---|
| Element Pro Gaming PC | RTX 5070 | A buyer seeking the listed Ryzen 7 7800X3D and RTX 5070 combination | The listing does not establish results for your game or stream settings. |
| Intel Core i7 Gaming PC | GTX 1660 Super | A buyer seeking an NVIDIA-equipped desktop for this workflow | Its listed GPU differs from the RTX 5070; test your chosen game while OBS runs. |
Choose the desktop for the games you play, then validate OBS on that exact machine. In OBS, NVIDIA hardware encoding uses a supported GPU's encoder; software encoding uses the CPU. Hardware encoding is the practical first setting for a single-PC gaming stream because it keeps encoding work off the game-running CPU. Its limitation is that it depends on a supported GPU and driver. Software encoding remains an option when hardware encoding is unavailable, but it adds CPU work while the game is running.
Connect your streaming account
- Open OBS Studio. Select Settings, then Stream.
- Choose your platform in Service. If OBS offers an account connection for that service, follow its sign-in flow. Otherwise, choose the stream-key method and enter the key supplied by your platform.
- Select Apply, then OK. Do not press Start Streaming yet.
Expected result: OBS has a streaming destination, but nothing has gone live. In 2026, check the platform's current connection instructions rather than copying a key or server setting from an old screenshot.
If the account connection fails, confirm you can sign in directly on the platform. If you chose a stream key, copy it again from the platform and paste it into the relevant OBS field. Never put that key in a scene, screenshot, or public setup post.
Configure video and encoding
- Select Settings and open Video. Set Base (Canvas) Resolution to match the display area you intend to capture. Set Output (Scaled) Resolution to 1920 × 1080 pixels as an initial test, then select 30 FPS under Common FPS Values.
- Open Output and select Streaming. Choose the available NVIDIA hardware encoder if your desktop has a supported NVIDIA GPU. If that option is absent, inspect the GPU and driver before switching to software encoding.
- Follow your streaming platform's current guidance for the remaining Streaming settings. Select Apply, then OK. Do not copy someone else's bitrate without checking your upload connection and the platform's requirements.
Expected result: OBS has a defined canvas, an output size, a frame rate, and an encoder. Those choices are a test configuration, not a promise that every game will run smoothly. If the recording struggles, 1280 × 720 pixels at 30 FPS is a simpler output test; compare both recordings on your own PC.
A smaller output can reduce the amount of video OBS must encode and send, but it also contains less image detail. Higher settings are useful only when the game, encoder, connection, and viewing result support them. Keep the first 2026 test simple enough that a problem is easy to isolate.
Build your game scene
- In Scenes, select + and name the scene for your game. In Sources, select +, then Game Capture.
- Choose Capture specific window and select the running game when it appears. If the game is not listed, launch it first and return to the source properties. Fit the source to the canvas using the preview so viewers see the game rather than an empty border.
- Watch Audio Mixer while the game makes sound and you speak into your microphone. Open Settings and Audio if a device is missing, then select the intended device for Desktop Audio or Mic/Auxiliary Audio.
- Select Start Recording, play and speak briefly, then select Stop Recording. Play back the saved file. Check the picture, game sound, and your voice separately.
Expected result: the recording shows the game and contains both intended audio sources. The moving bars in Audio Mixer show OBS receives a signal; playback confirms that signal reached the file. Do not treat one as proof of the other.
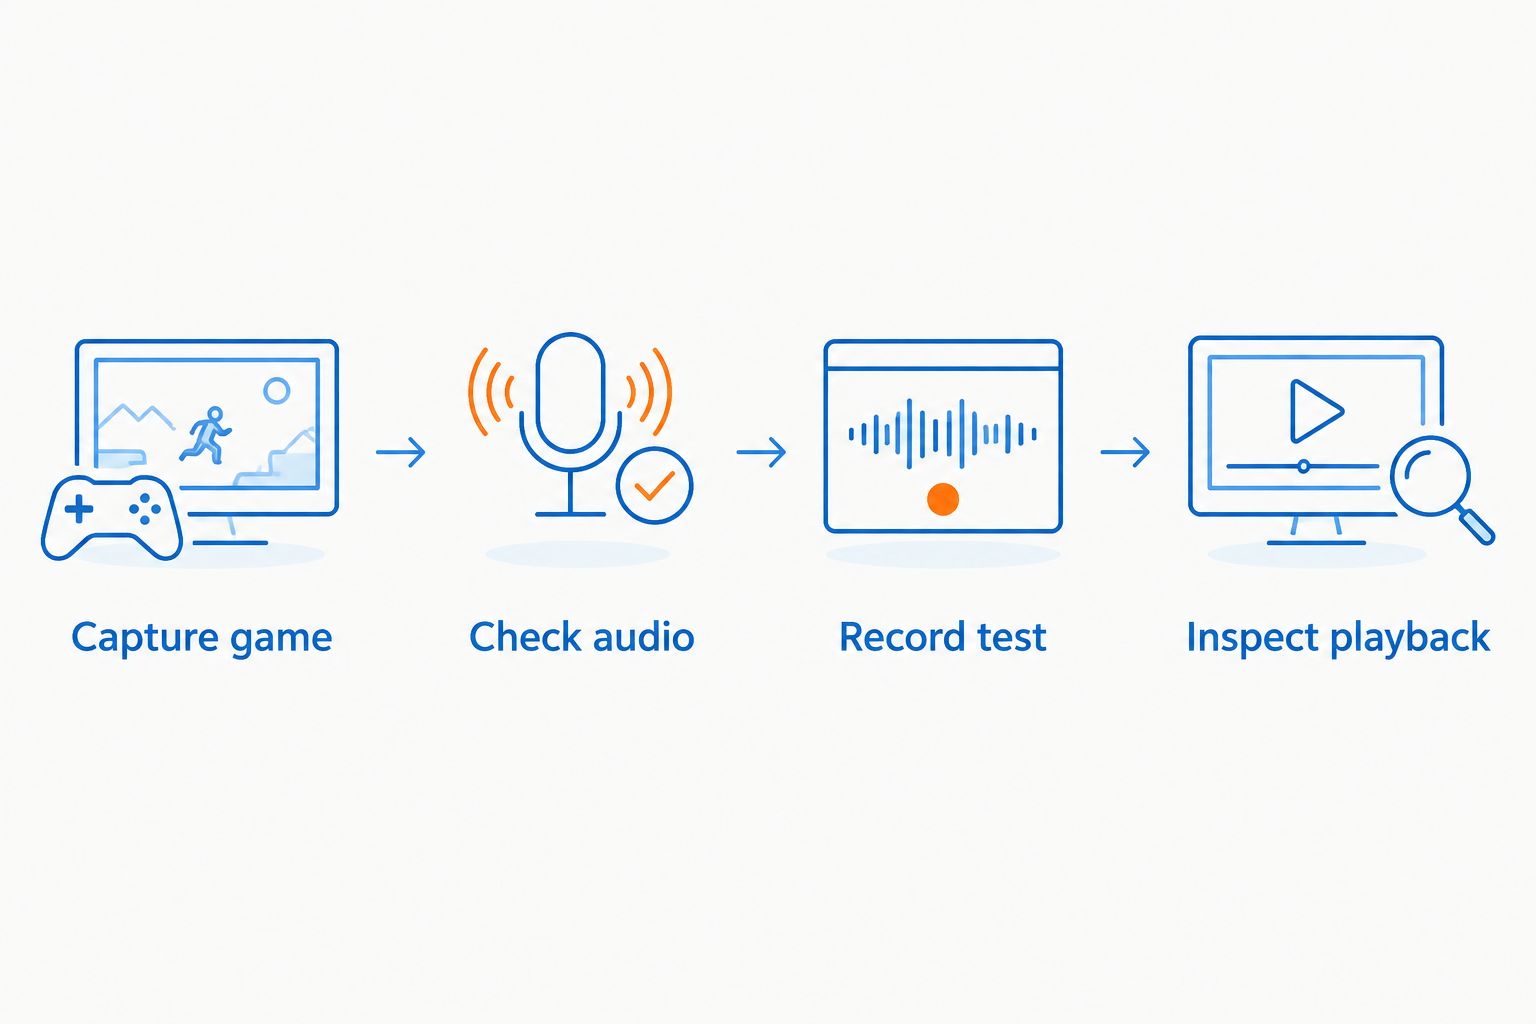
The test follows a fixed order: capture the game, check both audio sources, record, then inspect playback. Keep that order when you change a setting so you know which change fixed or broke the result.
If Game Capture remains blank, use Window Capture as a test source and select the game window. The trade-off is that window capture can include parts of a window you did not intend to show. Check the preview before broadcasting, especially when switching between a game and other apps.
Once the local file looks and sounds right, return to your platform to confirm its broadcast destination. Press Start Streaming in OBS and inspect the platform's own preview. A healthy local recording does not verify that the platform receives the stream, so check both ends in 2026.
Record gameplay without going live
The adjacent workflow skips the platform connection entirely: build the same scene, verify Game Capture and Audio Mixer, then use Start Recording instead of Start Streaming. This is the better 2026 route when you want footage to review or edit without an audience watching the setup.
Open Settings, then Output, and review the Recording section before you begin. Choose a recording location you can find afterward and check that the destination drive has room for your footage. Make a short file first, stop it, and play it back with sound. A file existing on disk is not proof its picture and audio are usable.
Keep your recording and streaming checks distinct. A local file tests capture, audio, and local encoding; a live preview also tests your connection to the platform. When you change the scene, repeat the short recording before the next stream. That small habit catches an accidentally muted mic or a game window that no longer matches your capture source.
Troubleshoot the failures that stop a stream
- Black preview, but the game runs: Open the Game Capture source properties and reselect the game under Capture specific window. Check the game's display mode and GPU assignment. Test Window Capture if the game still does not appear.
- Game audio moves, but your voice is absent: Speak while watching Audio Mixer. If the mic meter stays still, open Settings and Audio and select the microphone you actually connected. Record again; do not diagnose your mic from the platform preview alone.
- You hear an echo in the recording: Check whether the same microphone or game sound enters OBS through more than one source. Mute the duplicate source, make another short recording, and compare playback.
- The game feels fine, but the recording stutters: Recheck Output for the selected encoder and make a second test at 1280 × 720 pixels and 30 FPS. Compare the files while playing the same game. Change one setting at a time so the result means something.
- OBS records locally, but the platform receives nothing: Revisit Settings and Stream, confirm the selected Service and account or stream key, and check the platform's broadcast dashboard. A local recording cannot validate an account connection.
Customize your workflow
Once the basic scene passes a recording test, add sources only when they serve the broadcast. Put a webcam source in the scene if you use one, then check that its frame does not cover game information your viewers need. Add another scene if you want a different view before the game starts; preview it locally rather than discovering its contents on air.
Gaming and More lists the desktops above for buyers assembling a gaming setup, but an accessory does not fix a broken capture source or incorrect audio device. Set those first. If you are choosing gear around the PC, compare headsets for streamers and content creators after you know which audio connection your setup needs.
For a repeatable 2026 session, open the game, check the OBS preview, speak into the mic, and make a short recording. Review that file before selecting Start Streaming. When the game changes, confirm Capture specific window still points to the correct window; when the microphone changes, confirm the right input moves in Audio Mixer.
FAQ
How do I set up a prebuilt gaming PC for OBS streaming in 2026?
Connect your streaming account in OBS, configure video and encoding, add a game scene, check audio, and record a local test before going live. Inspect the platform preview after starting the stream.
Do I need a capture card to stream games from my prebuilt gaming PC?
No capture card is required for the single-PC workflow in this guide. OBS Game Capture can capture a game running on the same PC.
Should I use hardware or software encoding in OBS?
Start with NVIDIA hardware encoding when your PC has a supported NVIDIA GPU and OBS offers that encoder. Software encoding uses the CPU, so test it alongside your game if hardware encoding is unavailable.
Why does OBS show a black screen instead of my game?
Game Capture can show a blank preview when its selected window, game display mode, or GPU assignment does not match the running game. Reselect the window, check those settings, and test Window Capture if needed.
How do I check my microphone before an OBS stream?
Speak while watching the mic level in OBS Audio Mixer, then play back a short recording. The meter confirms OBS receives sound; playback confirms your recording contains it.
Can I record gameplay in OBS without streaming?
Yes. Build and test your scene, then select Start Recording rather than Start Streaming. Play back the file to verify both video and audio.
What OBS resolution should I test first?
Start by testing 1920 × 1080 pixels at 30 FPS, then compare a 1280 × 720-pixel, 30 FPS recording if the first result struggles. Your own game and PC determine which recording works.
One last thing
Test the saved file, not just the OBS preview. The preview can show a working game while your recording lacks the microphone audio you expected. A short playback check is the final gate before your first 2026 broadcast.


